Integrate with ApplePay
Paysafe.js v2 allows merchants to take payments from their websites using mobile-based payment methods, such as Apple Pay that rely on card payments made through the Paysafe Payments API. It is a JavaScript SDK which is based on the Payment Request API standard design. You can use this Javascript SDK to offer Apple Pay in your merchant website.
Advantages
- Complies with PCI SAQ-A
- Simple integration
- Fully "white label", with no indication to your customers that Paysafe is handling the payment
- No redirection from the merchant web site required
Example
If your OS and browser comply with Apple Pay prerequisites (an iOS or macOS device with Safari, and an Apple sandbox account) an example of Paysafe Request in action will be displayed below. If you do not meet these prerequisites, a message to that effect is displayed instead. The example does not make a real payment, and no money is transferred.
This device or browser is not compatible with Apple Pay, or you are trying to access the page using a device with a real Apple Pay account, rather than Sandbox.
The payment-handle returned can then be used to make a payment using the Payments API.
Obtain the Keys
Before you begin, you need to obtain your standard server-to-server API key (private key) and a Payment-handle generating API key (public key) from the Business portal.
Note:
- Contact your business relationship manager or reach out to integrations@paysafe.com for your credentials to the Business Portal.
- The payment-handle generating API key is used in your JavaScript code on the client to generate payment-handles from customer credit cards and bank accounts. Unlike the server-to-server API key, this key has no ability to take payment or carry out any other operation, and can therefore be safely exposed in your client side code.
To obtain the Public API key from the Business Portal:
- Go to Integrate>API Keys
- For Public Key, click the Copy icon to copy the API key.
- Your API key will have the following format:
- Key Username – MerchantXYZ
- Key Password – B-tst1-0-51ed39e4-312d02345d3f123120881dff9bb4020a89e8ac44cdfdcecd702151182fdc952272661d290ab2e5849e31b
- Your API key will have the following format:
- For Private key, click on "Authentic Now" and enter your Business portal password to view the private apikey
- Your API key will have the following format:
- Key Username – MerchantXYZ
- Key Password – B-tst1-0-51ed39e4-312d02345d3f123120881dff9bb4020a89e8ac44cdfdcecd702151182fdc952272661d290ab2e5849
- Your API key will have the following format:
- The API key is case-sensitive. For server-to-server calls, apikey is sent using HTTP Basic Authentication.
- To use HTTP Basic Authentication, you must send the API key credentials using the Authorization header with every request. You must construct the Authorization header as follows:
- Combine the Key Username and Key Password into a string separated by a colon, e.g., “Key Username:Key Password”.
- The resulting string literal is then encoded using Base64.
- The authorization method and space (i.e., “Basic”) are then put before the encoded string.
- For example, using the Key Username and Password examples above, the header is formed as follows:
- Authorization: Basic TWVyY2hhbnRYWVo6Qi10c3QxLTAtNTFlZDM5ZTQtMzEyZDAyMzQ1ZDN
For additional details on Authentication, see here.
Apple Pay Certificates
As a merchant, to accept payments from Apple Pay, you need to add two certificates called the processing certificate and identity certificate in the Business Portal. If the certificates are not added, you won’t be able to accept payments from customer’s Apple Pay accounts.
In the Business Portal, at Integrate > Apple Pay Certificates, you can add and manage your Apple Pay certificates. After you navigate to the Apple Pay Certificates page, you can see two sections:
The first step in the configuration is to add a Payment Processing Certificate from Apple’s website. If you are a merchant who accepts payments from web applications, you need to add the Apple Pay Merchant Identity Certificate.
To accept Apple Pay payments from both web and iOS, you need to configure the Merchant Payment Processing Certificate. This certificate is required to decrypt the token that is passed in Apple Pay transactions. Only when the token is decrypted the payment becomes successful.
Add a Merchant Identity Certificate
- Click Add a Certificate. The Add New Certificate screen appears.
- Click Generate CSR. A CSR file downloads to your local machine.
- Click Visit Apple Developer Portal. The Apple Developer portal opens in a new tab.
- Login to the Apple Developer portal. After you login, the Certificates, Identifiers, & Profiles page appears. As a merchant, you need to create a login in the developer portal and associate merchant ID’s associated under your profile to process Apple Pay payments.
- Click + (plus icon) to create a new certificate.
- Select Apple Pay Merchant Identity Certificate option and click Continue. The Select a Merchant ID step appears.
- Select a merchant ID that you’ve created in the Apple’s Developer portal and click Continue. The Upload a Certificate Signing Request step appears.
- Click Choose File and select the CSR file that you’ve downloaded previously in Step 2 and click Continue. The Download your Certificate step appears.
- Click Download to download the certificate.
- Navigate back to the Business Portal > Add New Certificate screen.
- Click Upload at the 3rd step. The Authenticate dialog appears.
- Enter your portal password in the dialog box and click Authenticate. The Select dialog appears.
- Select the certificate downloaded from the Apple Developer Portal. After you select a certificate, the portal shows if the upload was successful and shows the expiry date of the certificate. Also, you can see the certificates in the Integrate > Apple Pay Certificates page.
Add a Merchant Payment Processing Certificate
- Click Add a Certificate. The Add New Certificate screen appears.
- Click Generate CSR. A CSR file downloads to your local machine.
- Click Visit Apple Developer Portal. The Apple Developer portal opens in a new tab.
- Login to the Apple Developer portal. After you login, the Certificates, Identifiers, & Profiles page appears. As a merchant, you need to create a login in the developer portal and have some merchant ID’s associated under your profile to process Apple Pay payments.
- Click + (plus icon) to create a new certificate.
- Select Apple Pay Payment Processing Certificate option and click Continue. The Select a Merchant ID step appears.
- Select a merchant ID that you’ve created in the Apple’s Developer portal and click Continue. The Upload a Certificate Signing Request step appears.
- Click Choose File and select the CSR file that you’ve downloaded previously in Step 2 and click Continue. The Download your Certificate step appears.
- Click Download to download the certificate.
- Navigate back to the Business Portal > Add New Certificate screen.
- Click Upload at the 3rd step. The Authenticate dialog appears.
- Enter your portal password in the dialog box and click Authenticate. The Select dialog appears.
- Select the certificate downloaded from the Apple Developer Portal. After you select a certificate, the portal shows if the upload was successful and shows the expiry date of the certificate. Also, you can see the certificates in the Integrate > Apple Pay Certificates page.
Note:
- If the certificate expires then it is not possible to accept payments from Apple Pay payments. You can view the certificate expiry at Integrate > Apple Pay Certificate page.
- Merchants using the old setup of paysafe JS can refer to the old Netbanx Portal Guide to get the Apple Pay Certificates.
ApplePay using Paysafe JS SDK
Please follow the guides on how to integrate with Paysafe JS: Paysafe JS Integration
- Obtain your public (single-use token creation) and private (payment processing) API keys from the Merchant Portal
- Create your custom HTML payment form with the content (text and images) and style you require.
- Include the Paysafe.js JavaScript SDK (paysafe.min.js) <script> tag in the <head> element of your HTML payment form.
- Add empty container elements (typically <div>) to your HTML for the Apple Pay button (and/or the payment fields).
- Call the SDK fields.setup function with your single-use token API key. The setup function creates the Apple Pay button (and any other fields) inside the provided containers.
- Call the SDK instance.show function without any parameters. The show function visualizes the Paysafe JS fields and returns a list of available payment methods.
- Finally, add the instance.tokenize function to the Apple Pay button's click event. This returns a single-use payment handle token (the token representing the payment data entered by the user is stored in the Payment API). Single-use tokens are valid for only 15 minutes.
- Send the token to your merchant server, where the standard Payment API payment endpoint can be used to make payment.
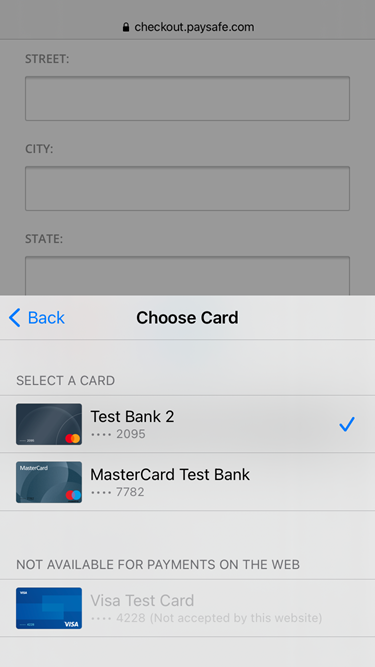
You must include the supportedCountries parameter when taking ApplePay card payments in order to prevent transaction failure if the cards in a customer's wallet have been issued in non-supported countries. Any cards that have been issued in non-supported countries will be displayed as not available for the payment, and the customer will be unable to select them to complete the transaction.
Example Payment Form
The following is a simple Paysafe.js code sample that creates a payment form with Apple Pay button. The payment button triggers tokenization of the user-entered data and (if tokenization was successful) displays the token in the browser console.
<!-- Basic Paysafe.js example -->

<html>

  <head>

    <!-- include the Paysafe.js SDK -->

    <script src="https://hosted.paysafe.com/js/v1/latest/paysafe.min.js"></script>

  </head>

  <body>

    <!-- Create divs for the payment fields -->

    <div id="apple-pay"></div>

    <p></p>


    <script type="text/javascript">

      // Base64-encoded version the Single-Use Token API key.

      // Create the key below by concatenating the API username and password

      // separated by a colon and Base 64 encoding the result

      var API_KEY = 'Your Base64-encoded Single-use-Token Api Key';


      var options = {

        // You must provide currencyCode to the Paysafe JS SDK to enable the Payment API integration

        currencyCode: 'USD',


        // select the Paysafe test / sandbox environment

        environment: 'TEST',

        accounts: {

          default: 0000000000,

         // Provide an apple pay merchant account if you have more than one configured for that same API key

         // applePay: 1111111111

        },


        // set the CSS selectors to identify the payment field divs above

        // set the placeholder text to display in these fields

        fields: {

          applePay: {

            selector: '#apple-pay',

            type: 'buy',

            label: 'Demo JS',

            color: 'white-outline',

          },

        },

      };


      // initalize the hosted iframes using the SDK setup function

      var demoInstance;

      paysafe.fields

        .setup(API_KEY, options)

        .then(instance => {

          console.log('Setup instance completed.');

          demoInstance = instance;

          return instance.show();

        })

        .then(paymentMethods => {

          if (paymentMethods.applePay && !paymentMethods.applePay.error) {

            document.getElementById('apple-pay').addEventListener(

              'click',

              function (event) {

                demoInstance

                  .tokenize({

                    amount: 1000,

                    transactionType: 'PAYMENT',

                    paymentType: 'APPLEPAY',

                    applePay: {

                      country: 'US',

                    },

                    customerDetails: {

                      billingDetails: {

                        country: 'US',

                        zip: '90210',

                        street: 'Oak Fields 6',

                        city: 'ca',

                        state: 'CA',

                      },

                    },

                    merchantRefNum: 'merchant-ref-num-' + new Date().getTime(),

                  })

                  .then(result => {

                    // write the Payment token value to the browser console

                    console.log(result.token);


                    // close the Apple Pay window

                    demoInstance.complete('success');

                  })

                  .catch(error => {

                    // display the tokenization error in dialog window

                    alert(JSON.stringify(error));


                    // close the Apple Pay window

                    demoInstance.complete('fail');

                  });

              },

              false,

            );

          }

        })

        .catch(error => {

          // display any setup errors

          alert(JSON.stringify(error));

        });

    </script>

  </body>

</html>
For more information on how to tokenize an Apple Pay payment, please refer to Tokenize → Tokenize Example with Apple Pay
ApplePay SDK Setup
The setup and show functions create and initialize the Paysafe.js payment methods inside the selected HTML element containers (typically div elements) on your payment page.
To initialize Paysafe JS with Apple Pay you should add applePay field in the options.fields section.
Example of initializing Paysafe JS with ApplePay:
const options = {

        accounts: {

            default: 10101010,

        },

        environment: 'TEST',

        fields: {

            applePay: {

                selector: '#apple-pay',

                type: 'buy',

                label: 'Demo JS',

                color: 'white-outline',

            }

        },

        currencyCode: currencyCode

    }


let hostedFieldsInstance;

paysafe.fields.setup(apikey, options)

    .then(instance => {

        hostedFieldsInstance = instance;

        return hostedFieldsInstance.show();

    }).then(paymentMethods => {

           if (paymentMethods.applePay && !paymentMethods.applePay.error) {

               // Subscribe for click event on applePay button

            }

    })

    .catch((error) => {/** Process any errors during the setup*/})
Or you can use async-await:
async function setupPaysafeJS() {

    const options = {

        accounts: {

            default: 10101010,

        },

        environment: 'TEST',

        fields: {

            applePay: {

                selector: '#apple-pay',

                type: 'buy',

                label: 'Demo JS',

                color: 'white-outline',

            }

        },

        currencyCode: currencyCode

    }


    try {

        const instance = await paysafe.fields.setup(apikey, options)

        const paymentMethods = instance.show()

        if (paymentMethods.applePay && !paymentMethods.applePay.error) {

               // Subscribe for click event on applePay button

        }

    } catch(error) {

        /** Process any errors during the setup*/

    }

}