Before You Begin
Please Note: As an ISV / Paysafe Partner, you will need to complete all of the below "merchant" steps on behalf of the Parent Merchant Legal Entity (PMLE) that your merchants will be operating under.
To support Apple Pay on your website, you must complete the following setup steps in your Apple Developer Account and Paysafe Merchant Back Office. The steps include
-
Register an Apple Pay Merchant ID
-
Create a Payment Processing Certificate
Register an Apple Pay Merchant ID
The merchant should create an Apple Pay Merchant ID on the Apple Developer Portal. It is a unique identifier registered with Apple that identifies your business as a merchant to accept Apple Pay payments.
See Create a merchant identifier for the setup steps.
Create a Payment Processing Certificate
Payment Processing Certificate is a certificate associated with your merchant ID and is used to secure transaction data.
To obtain the Payment Processing Certificate, follow the below three steps:
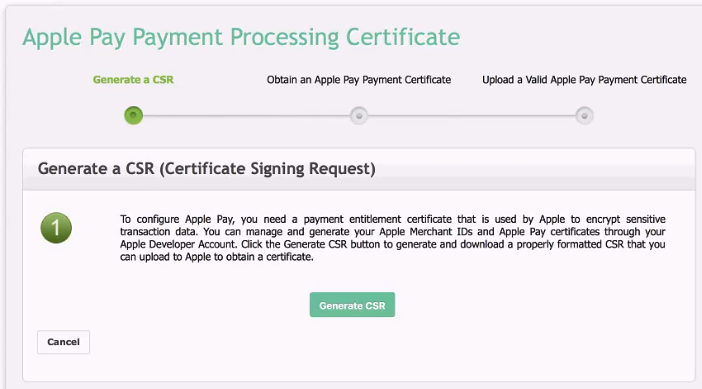
- Obtain a CSR (certificate signing request) file from Paysafe Merchant Back Office.
- Go to the Paysafe merchant back office and in the Apple Pay settings, click Add Payment Processing Certificate.

-
Generate a Certificate Signing Request (CSR) by clicking Generate CSR.
- Go to the Paysafe merchant back office and in the Apple Pay settings, click Add Payment Processing Certificate.
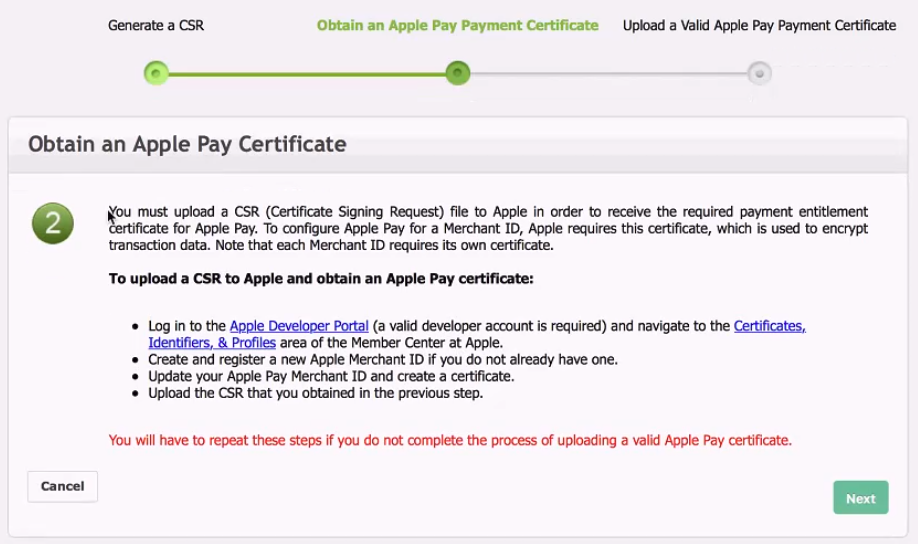
- Use this CSR to generate a certificate through Apple Developer Portal. See Create a payment processing certificate for the setup steps.
-
Upload the certificate back in the Paysafe Merchant Back Office.
- In the Merchant Back Office, click Next.

-
Upload the newly created Apple Pay Payment Certificate.

- In the Merchant Back Office, click Next.
Integration Options
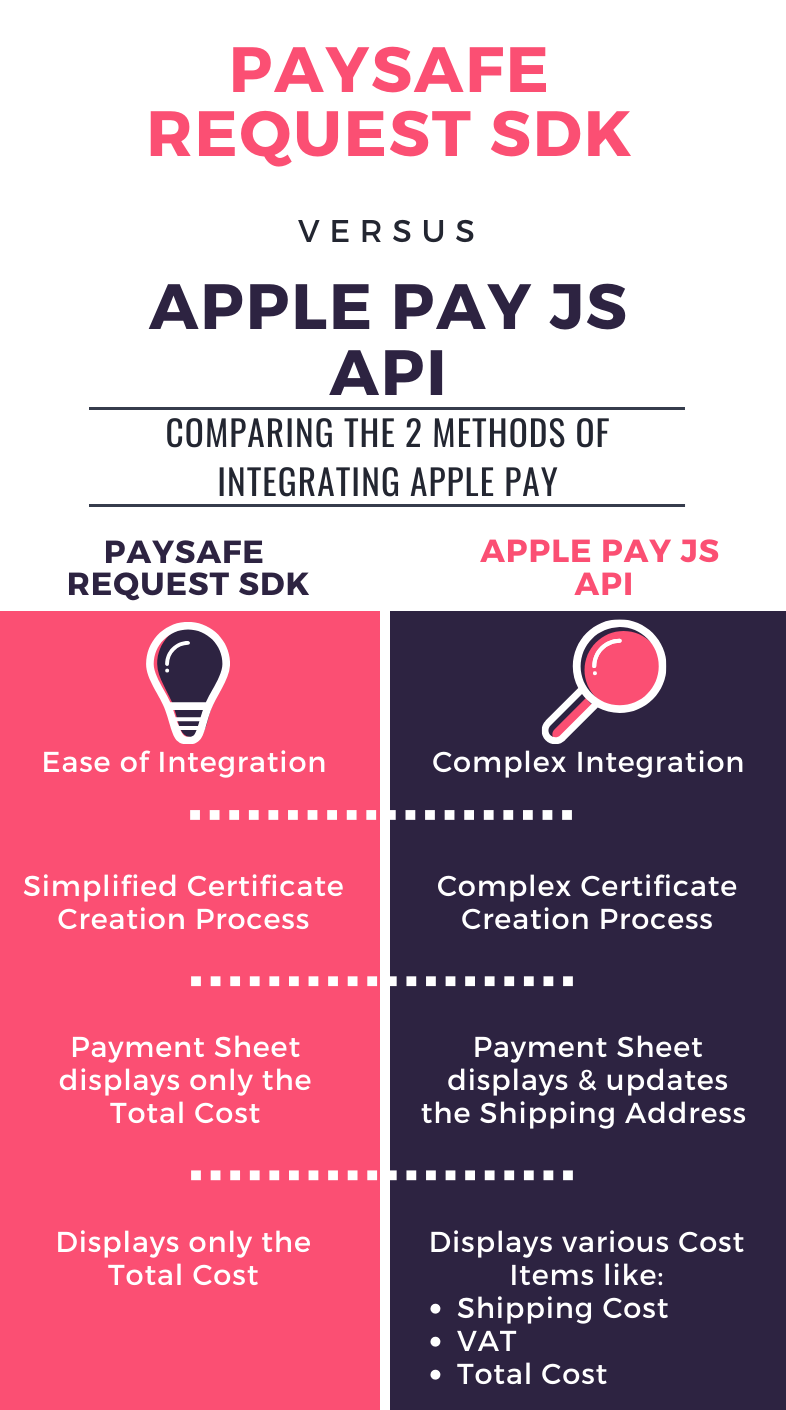
There are two ways to integrate Apple Pay with Paysafe to process transactions within your website:
- Using the Integrating Apple Pay JS API
- Using the Paysafe Request SDK
These methods are described below.
